Friday, January 22, 2016

Chocolate Almond Snow Day Cake

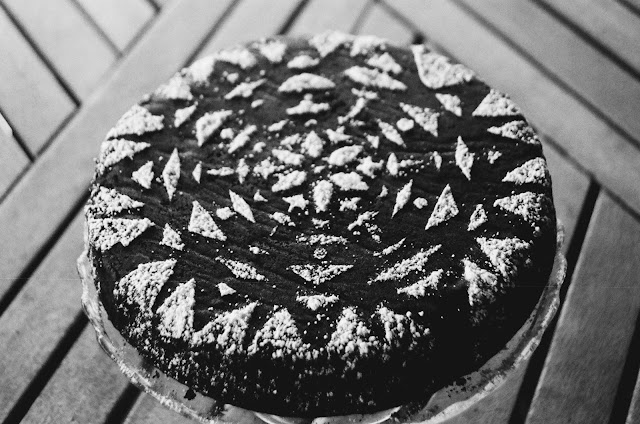
Chocolate Almond Snow Day Cake with Snowflake

I'm currently camped out at my friends' house, stretched out on the couch as I look out the window to a foot of snow on the ground, with much more on the way. I've got a stack of books at my feet, a to-do list on my lap, and between my house and theirs, a stockpile of beer, wine, and ingredients for lemon bars, brownie pie, pepperoni rolls, bourbon snow creams, and leftover gumbo. In my living room, new-to-me cross-country skis are waiting to be waxed and balls of yarn are ready to be knit into a cardigan. There's something about a snow day stretched ahead of me that inspires a childlike possibility-- the hours seem longer, the neighborhood suddenly becomes a mysterious world to explore, and creations-- whether edible, textile, or otherwise-- beg to be created.

I won't linger here long in favor of all the snow day left to be lived, but I remembered this cake I made over the holidays and it struck me as a perfect wintery weather-bound project. Hearty, rich, and not too fussy, it's just the thing I'd want to pair with one of those bourbon snow creams after skiing the city streets. Most of the ingredients are those you're likely to have at home, and you could substitute the almonds for other nuts-- I imagine hazelnuts, pecans, and walnuts would all do the trick. When I made this at Christmas, my mom cut out a paper snowflake, which I put on the cake to use as a stencil for a powdered sugar dusting-- another worthy snow bound endeavor.

Chocolate Almond Snow Day Cake with Snowflake

Chocolate Almond Cake
Adapted from Nigel Slater via The Guardian

Ingredients
7 ounces (200g) fine dark chocolate (60% or more)
1 ounce hot espresso or very strong coffee
14 Tablespoons unsalted butter, cut into cubes
2/3 cup all-purpose flour
1 teaspoon baking powder
2 Tablespoons good quality cocoa powder
5 large eggs, separated
1 cup granulated sugar
4 ounces almond meal (or finely ground almonds)

Directions
1. Butter and line 9-inch cake pan with parchment paper and set aside. Preheat the oven to 350 degrees F.

2. Break or chop the chocolate into small pieces and place in the top of a double boiler or in a bowl over gently simmering water. As soon as the chocolate begins to melt, pour the hot espresso or coffee over it.  Drop the cubed butter into the chocolate and coffee, but do not stir.

3.  Keeping an eye on the chocolate, whisk together the flour, baking powder, and cocoa in a medium-sized bowl. Set aside.

4. Separate the eggs, dropping the egg whites into a large bowl and the yolks into a separate small bowl. Whisk the whites till they are thick and stiff then quickly but gently fold in the sugar with a large metal or wooden spoon and set aside.

5. Remove the chocolate mixture from the heat and stir to dissolve the remaining butter. Mix the egg yolks together then stir quickly into the chocolate, just until the ingredients come together. Fold the chocolate mixture firmly but gently into the egg whites and sugar.

6. Lightly fold in the flour and cocoa mixture, followed by the almond meal. Work slowly and firmly but lightly, making sure to not over mix. Transfer the batter into the greased and lined cake pan and bake for 25 minutes or until a skewer inserted in the middle comes out clean. Let cool, then decorate with powdered sugar if desired. Enjoy!

Related recipes:
Bittersweet Chocolate Pecan Pie
Chocolate Chess Pie
Whiskey-Soaked Dark Chocolate Bundt Cake

Tuesday, January 19, 2016

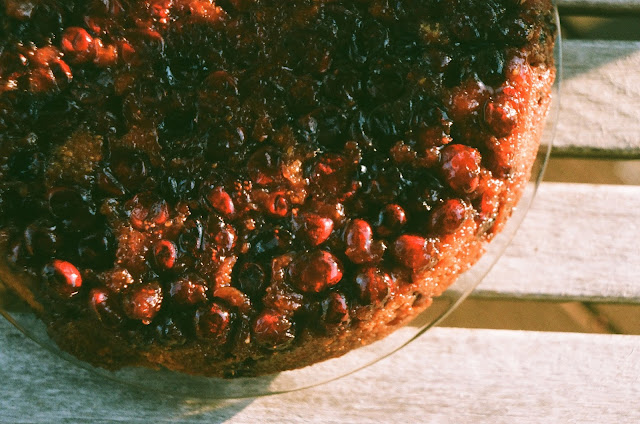
Cranberry Upside Down Cake

Cranberry Upside Down Cake on film

Last year I wrote about the origins of the native cranberry and the cultural history of the fruit in the Pine Barrens of New Jersey, as studied by Mary Hufford for the American Folklife Center. Now that I'm in West Virginia, I've been learning more about the cranberry glades here in the state-- in Monongahela National Forest and Dolly Sodds Wilderness. On New Years Eve when I was making a a lemon layer cake with cranberry curd and garnish, and my new friend Emily told me that she had harvested some cranberries in Tucker County this year, where Dolly Sodds is located. I assumed that they were the small wild cranberries I had seen up in Maine this September, but she said those she harvested were just as big as the store-bought variety I was using on the cake.

I'm looking forward to being in West Virginia for cranberry season this year, but for this Cranberry Upside Down Cake, I used more of the regular store-bought variety. Cranberries are my favorite thing to bake with in the wintertime-- their tartness is a pie baker's dream and their red hue is a welcome bright spot during winter's doldrums. I highly recommend stockpiling cranberries in your freezer when you can-- they don't always stick around in grocery stores past Christmas.

This cake, adapted from David Lebovitz, uses the pineapple upside down cake/tarte tatin principle, in which the fruit is caramelized in sugar over the stove, the batter or crust is poured over top, and the dessert is baked upside down in the same pan, then flipped so the fruit sits atop. Like ripping off a bandaid, it's best the flip is done in one swift motion and with courage.

I made this for Christmas dessert this year, along with a Lemon Chess Pie and Nigel Slater's Chocolate Almond Cake. It was a big hit, especially with my dad, who I still don't think has forgiven my mom and me for leaving the leftovers at our friends' house the next day.

Cranberry Upside Down Cake on film

Cranberry Upside Down Cake
Adapted only slightly from David Lebovitz

Ingredients
For the topping:
4 Tablespoons unsalted butter, cubed
3/4 cup light brown sugar, packed
2 cups (1 bag) fresh or frozen cranberries

For the cake batter:
1 1/4 cup all-purpose flour
1/4 cup coarse cornmeal
1 1/2 teaspoon baking powder
1/4 teaspoon salt
1/2 cup unsalted butter, cubed and at room temperature
3/4 cup granulated sugar
Grated zest of 1 small orange or lemon
2 large eggs
1 teaspoon vanilla extract
1/2 cup whole milk

Directions
1. For the topping: Place the butter and brown sugar in a 9- or 10-inch skillet over low heat. Mix and melt together, stirring constantly until the sugar is liquified. When the mixture begins to bubble, remove from heat and set aside.

2. For the cake: Preheat oven to 350 degrees F. In a small bowl, whisk together the flour, cornmeal, baking powder, and salt. Set aside.

3. In the bowl of a stand mixer fitted with the beater attachment, cream the 1/2 cup of butter, granulated sugar, and citrus zest on medium-high for 3-5 minutes until very light and fluffy. Reduce the speed of the mixer to medium and add the eggs one at a time, stopping in between to scrape down the sides of the bowl. Add the vanilla extract.

4. On low-speed, add half of the flour mixture, the milk, and then the remaining flour mixture, mixing just until combined. Do not overmix.

5. Evenly distribute the cranberries in the cast-iron skillet over the brown sugar mixture (You may need to re-heat the mixture on low if it has solidified). Pour the batter over the cranberries, then use a spatula to make sure it is evenly distributed over the berries.

6. Bake the cake until the "top" is golden brown and a toothpick inserted in the center comes out clean, 50-60 minutes. Remove from oven and after 10 minutes, run a knife around the edge of the cake. Place a cake plate over the top of the skillet and flip onto the plate (have courage!) until the cake releases from the pan. Serve cake warm and enjoy.

Related recipes:
Chocolate Cranberry Chess Pie
Cranberry Chess Pie
Cranberry Pie
Pear Tarte Tatin

Thursday, January 14, 2016

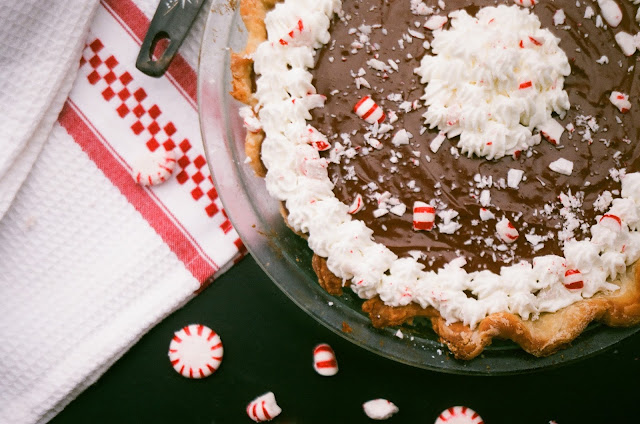
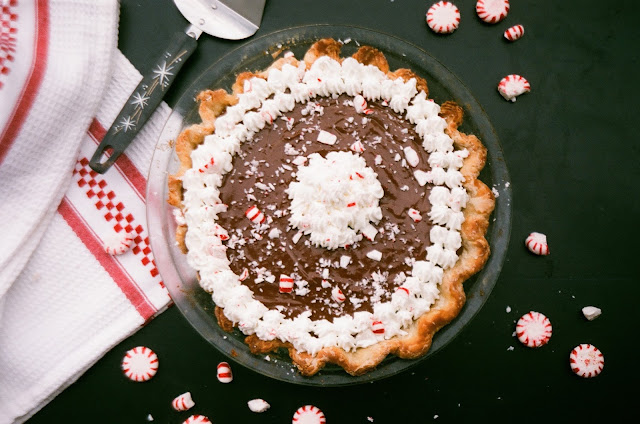
Chocolate Peppermint Cream Pie

Chocolate Peppermint Cream Pie

Aside from holiday guides and Molly's beautiful illustrations, it's been a while since I've written a proper post. I do have a fairly justifiable excuse, though: at the end of October, I packed up my D.C. apartment, and with my parent's help, drove the 360 miles to my new home in Charleston, West Virginia. The move was prompted by my acceptance of a state folklorist position with the West Virginia Humanities Council-- a real dream job for me.

Since then, it's been a whirlwind-- a new city, a new state, a new apartment, a new job where I'm building a new program. I got an all-wheel drive car and a Janus-faced tortoiseshell kitten named Wren. I really like it here-- it's friendly and cheap and scrappy and coleslaw is an obligatory topping on all hot dogs. But it did take me a while to settle into my new place. Mainly, this was because the state of the kitchen was not especially conducive to baking, an activity that always grounds me in a new place. However, with my parents' help once again, a good dose of elbow grease, and a coat of paint, my kitchen is now a room where I don't mind spending a few hours, say, baking a pie.

Chocolate Peppermint Cream Pie

This Chocolate Peppermint Cream Pie was the first I made here. King Arthur Flour and Bon Appétit were both touting their Chocolate Cream Pie and I had brought with me an excess of homemade mint extract and peppermint candies from some past baking projects so I adapted the recipe to incorporate these. I had some leftover filling, which I scooped into ramekins for Chocolate Peppermint pots de crèmes, and I brought most of the pie into work the next day-- not a bad way to win the favor of your new coworkers.

Chocolate Peppermint Cream Pie

Chocolate Peppermint Cream Pie
Adapted from King Arthur Flour

Ingredients
For the pie:
Nothing in the House pie crust, halved
2 Tablespoons unsalted butter, cut into cubes
1 1/3 cups semisweet chocolate, chopped
1 Tablespoon peppermint extract (can add more or less to taste)
2/3 cup granulated sugar
3 Tablespoons cornstarch
2 Tablespoons unsweetened cocoa powder
1 teaspoon espresso powder, optional (for richer chocolate flavor)
1/8 teaspoon salt
3 large egg yolks
1 cup heavy cream, divided
2 cups whole milk
1 beaten egg + 1 Tablespoon whole milk or cream, for egg wash
Turbinado sugar, for dusting

For the topping:
1 cup heavy cream
1/4 cup confectioners sugar
1/2 teaspoon vanilla extract
1/2 cup peppermint candies (or leftover candy canes), crushed

Directions
For the crust:
1. Prepare half of Nothing in the House pie crust as per the directions, reserving the leftover egg for an egg wash and saving other half of the recipe in the freezer for a future pie. Chill dough at least one hour before rolling and fitting into a greased and floured 9-inch pie pan. Prick crust with fork all over the bottom. Place pie pan in the freezer for 1 hour to set before baking. Meanwhile, preheat oven to 350 degrees F.

2. Remove crust from freezer, line with parchment paper and fill with pie weights or dried beans. Blind bake crust for 20 minutes. After 20 minutes, remove paper and weights, brush with egg wash and dust with Turbinado sugar. Return crust to oven and bake for 5-8 more minutes more or until fully baked, puffed, and golden brown. Let cool while you prepare the filling.

For the filling:
1. In a medium mixing bow, place the chopped chocolate, butter, and peppermint extract. Set aside. In a medium saucepan off of the heat, whisk together the sugar, cornstarch, cocoa, espresso powder (if using), and salt. Whisk in 1/4 cup of cold heavy cream until the mixture is smooth and no lumps remain. Repeat with another 1/4 cup of the cream, then whisk in the egg yolks.

2. Put the saucepan over medium heat, and gradually whisk in the remaining cream and milk. Bring the mixture to a boil, whisking constantly for 1 minute. Remove the pan from the heat and pour the mixture over the chocolate and butter. Whisk until the chocolate is melted and the mixture is smooth. Pass the filling through a sieve into a bowl to make sure there are no lumps.

3. Place plastic wrap tightly over the surface of the chocolate mixture to prevent a skin from forming. Place in the fridge until completely chilled. Meanwhile, prepare the topping.

For the topping:
1. Pour the heavy cream into the bowl of a stand mixer fitted with the whisk attachment. Whip until the whisk begins to leave tracks in the bowl. Add the sugar and vanilla and whip until the cream holds a medium peak.

2. Transfer the chilled filling to the cooled and baked pie crust and smooth with a rubber spatula. Spoon or pipe the whipped cream on top of the filling. Chill the pie until ready to serve, then sprinkle with crushed peppermint candies.

Chocolate Peppermint Cream Pie Slice

Related recipes:
Chocolate Chess Pie
Dark Chocolate Lavender Tart with a Lemon Cardamom Crust
Grasshopper Pie
Homemade Peppermint Extract
Peppermint Pattie Tart

Wednesday, January 13, 2016

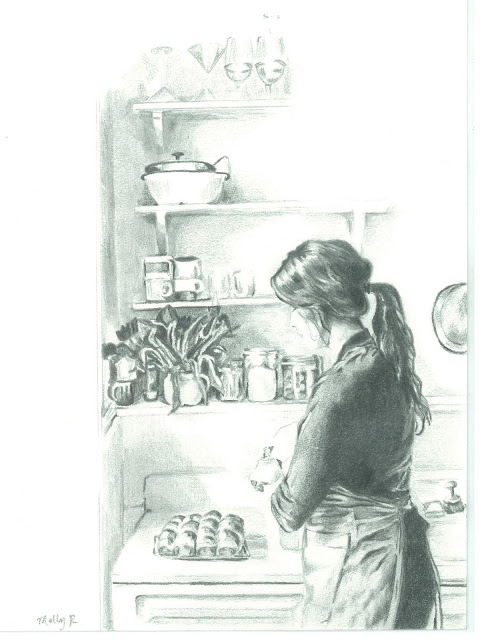
Molly Reeder's Kitchen Drawings

Illustration of Emily Hilliard of Nothing in the House by Molly Reeder
A couple of years ago, my friend Mack shot an interview with me as I prepared for our annual Pi(e) Day celebration at my home in D.C. In the interview, I talk about how I learned to bake from my mom and grandmother, so ask Mack was putting together the footage, she asked if I had any photos of them working in the kitchen that she could use as B-roll. I asked my mom, and she scoured albums and photo boxes, and found none. There were pictures of desserts she had made, of my brother and I blowing out candles on homemade birthday cakes, and of the family sitting around the table at Thanksgiving, but there were no images of her doing the actual labor of home cooking. 

That struck me as odd and unbalanced. It may be my folkloric tendencies speaking here, but for me the images of daily work-- in messy kitchens, basement workshops, or leaf-strewn yards-- carry more emotional and narrative weight than the posed and stifled family photos taken during vacations or at graduations and family reunions. They capture us in situ, and convey a story about who we are and what we do and make and value.

So I was particularly excited when artist Molly Reeder contacted me about her kitchen drawing project, in which she illustrating a series of images of cooks and bakers working in their home kitchens. She highlights this labor so beautifully, in grayscale pencil drawings that accentuate the gestures and stances of her subjects as they sprinkle sugar, wash dishes, or consult a cookbook recipe. Molly illustrated a photo of me taken by Mack during those Pi(e) Day preparations of 2014, and is working on an entire series, including the one below of Yossy Arefi of Apt 2B Baking Co

Illustration of Yossy Arefi of Apt. 2B Baking Co. by Molly Reeder

I'm honored to be a part of this project which so elegantly illuminates the daily activity of kitchens, and I can't wait to see the final exhibit. You can find more of Molly's work and more about the series via her website and on Instagram.

Cranberry Chess Pie

Fig Pistachio Tarte Tatin

Peppermint Pattie Tart

Whiskey & Dark Chocolate Bundt Cake

Blog Archive